
Yungang Grotto 6: Central Pillar and Ceiling
Yungang Grotto 6: Central Pillar (south side)
Yungang Grotto 6: South Wall, East Wall, and Central Pillar (east side)
Yungang Grotto 6
CHINA, Shanxi, Datong
This central pillar grotto was constructed between the years 465 and 494 and is a twin to the adjacent Grotto 5. It measures 13.4 m in width and 13.8 m in depth, and has a square layout with a lattice ceiling. In front of the main entrance is a wooden tower renovated in 1651.
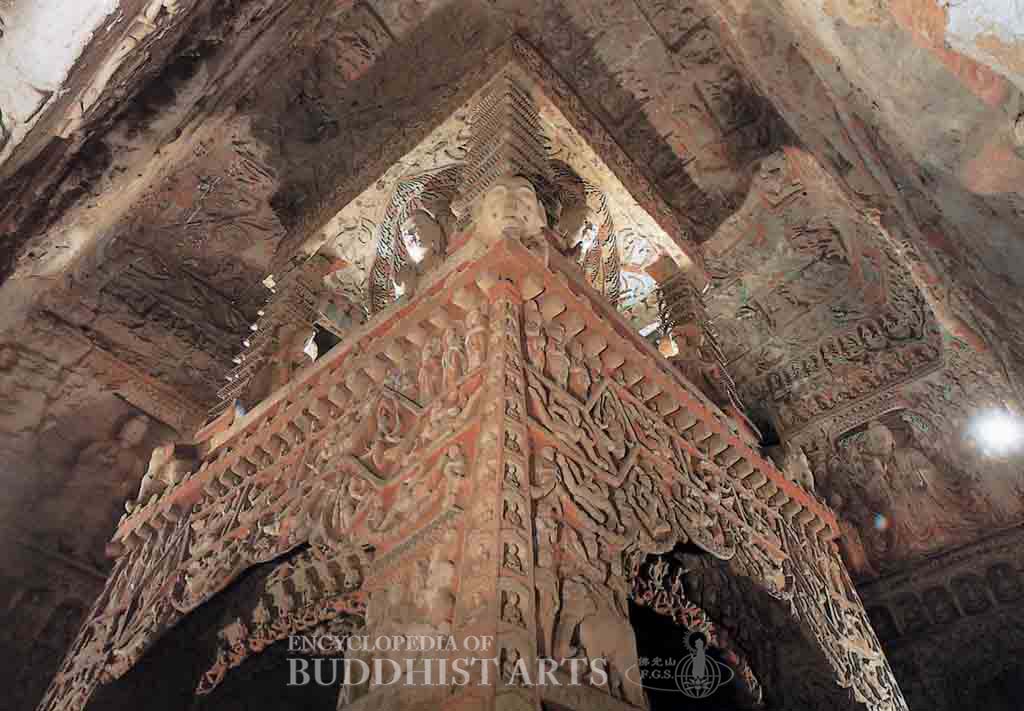
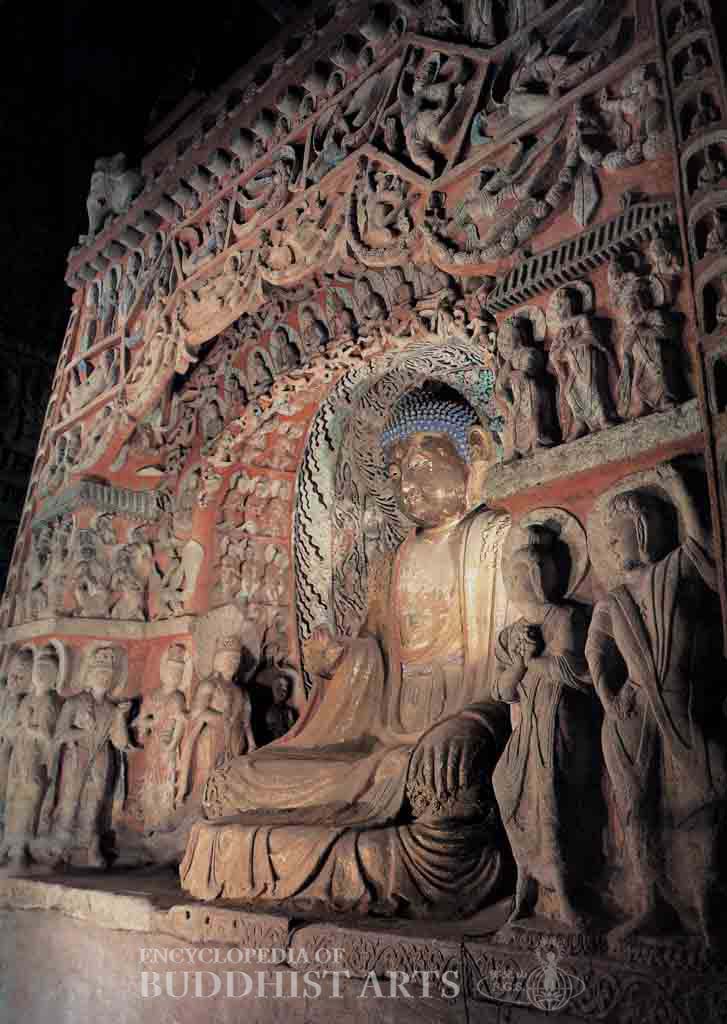
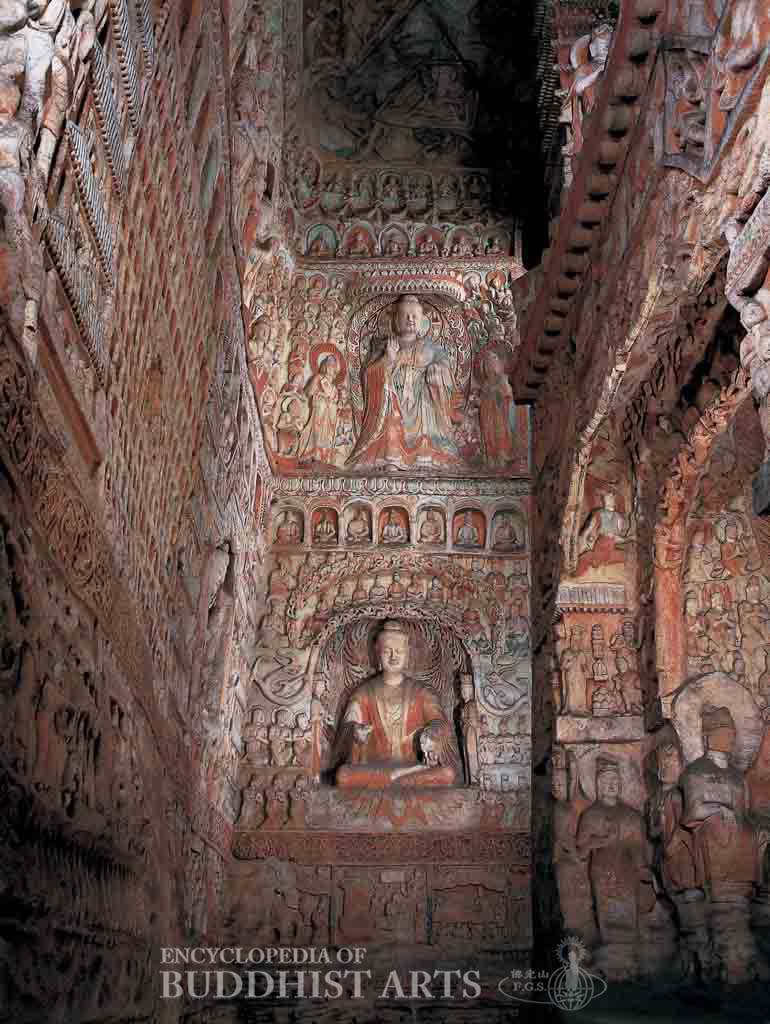
The 14.4 m high central pillar is carved with an upper and lower niche on each side. Between the two tiers are details of an imitation wooden structure such as eaves. Each double-layer niche on the lower tier consists of an outer trapezoidal niche and an inner arched niche. The lintels are decorated with imitation drapes and numerous other carvings including Buddha images, apsaras, heavenly beings making offerings, and children holding beaded garlands. The spaces outside the niche and on both inner walls are also filled with carved images of apsaras, disciples, Bodhisattvas, warriors, yaksas, and illustrations of scenes from the Life of the Buddha. Each niche features a different central figure: the niche on the south side features a seated Buddha which has been renovated and reflects a different style than the other images in the grotto; within the niche on the east side is Maitreya Bodhisattva; on the west side is a Buddha seated with legs pendent; and on the north side are Sakyamuni and Prabhutaratna Buddhas seated together.
Each corner of the central pillar’s upper tier is carved in the shape of a nine-story pagoda supported by elephants. Three small seated Buddhas are depicted on each side of the nine stories. Inside the niches are standing Buddhas measuring approximately 5 m in height and flanked by attendant Bodhisattvas. Each Buddha wears a loose monastic robe tied at the waist, while the Bodhisattvas wear long, flowing garments and stoles. The top of the central pillar is carved to resemble a canopy decorated with hanging triangular drapes and images of garudas. The ceiling around the central pillar is filled with carved images, including dancing apsaras, lotuses, and heavenly beings riding on peacocks, lions, tigers, and turtles. The carvings in the latter group are particularly interesting as they are rare among those at Yungang.
The back (north) wall of the grotto features two tiers of niches which have suffered severe weathering and are significantly damaged. On the upper tier there are three adjacent niches: the niche on the right features a single Buddha while the central and left niches contain Buddha triads. The lower tier consists of a large, trapezoidal niche divided into three bays. The central bay features a 6.1 m high standing Buddha, while the side bays contain 5.6 m high attendant Bodhisattvas.
The east and west walls of the grotto are similarly laid out with two tiers of three niches. The three niches on the upper tier of both walls feature a Buddha and two Bodhisattvas surrounded by disciples. The niches on the lower tier of the west wall feature, from left to right: a cross-ankled Maitreya Bodhisattva, an illustration of the Defeat of Mara and Enlightenment, and a cross-ankled Bodhisattva. The niches on the lower tier of the east wall contain the Conversion of the Three Kasyapa Bothers by Defeating Nagas, the Thousand Buddhas, and the First Turning of the Dharma Wheel at Deer Park.
An arched doorway with a window above it is carved in the front (south) wall of the grotto. Two tiers of niches appear on each side of the doorway and window featuring a Buddha and two Bodhisattvas. A house-shaped niche carved between the doorway and the window contains an illustration of the Vimalakirti Sutra, with Sakyamuni Buddha seated in the center, flanked by Vimalakirti and Manjusri Bodhisattva.
Thirty-three illustrated reliefs of scenes from the Life of the Buddha are carved on the bottom of the front (east), and west walls, as well as on either side of the lower niches on the central pillar. The majority of the reliefs on the front, east, and west walls have been severely weathered and are no longer extant, but the images on the central pillar have been relatively well preserved.
For more details, go to the Encyclopedia of Buddhist Arts: Caves T-Z, page 1655.
Cite this article:
author = Hsingyun and Youheng and Johnson, Peter and Mankuang and Huntington, Susan and Edson, Gary and Neather, Robert,
booktitle = {Encyclopedia of Buddhist Arts: Caves T-Z},
pages = 1655,
title = {{Yungang Grotto 6}},
volume = 9,
year = {2016}}