
Yungang Grotto 2: Central Pillar and East Wall
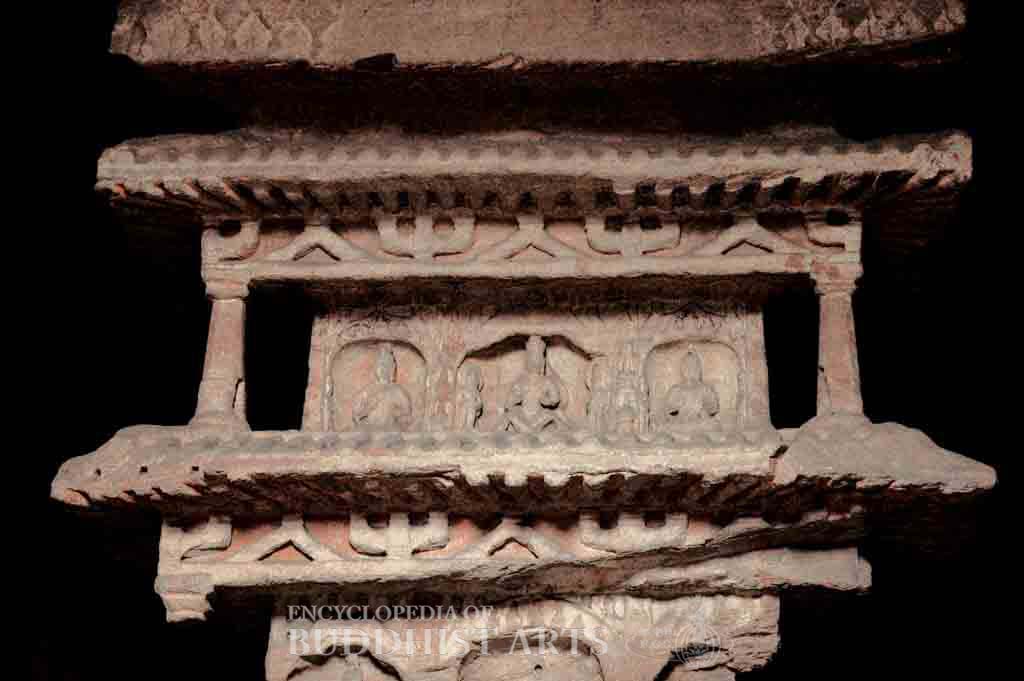
Yungang Grotto 2: Central Pillar (east side, upper tier)
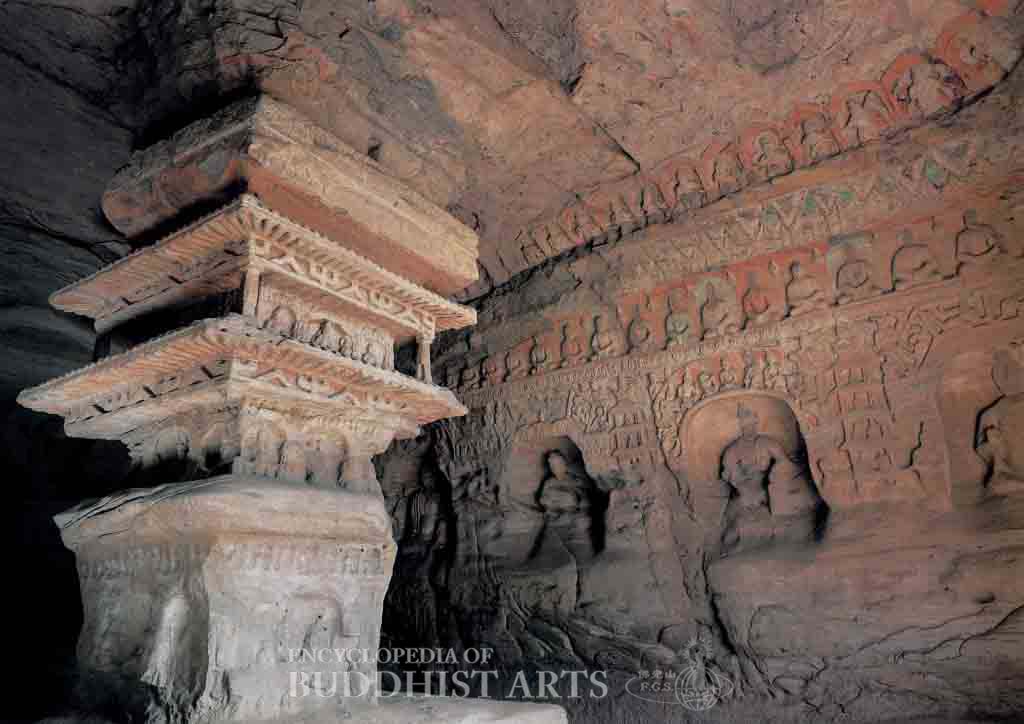
Yungang Grotto 2
CHINA, Shanxi, Datong
This grotto is located in the east area and was constructed between the years 465 and 494. It is a twin to Grotto 1, mirroring it in both layout and artwork. The ceilings of the two grottoes are almost identical, but due to weathering the only images discernible in Grotto 2 are three lotuses, a dragon, and part of an apsara. A row of heavenly musicians is also carved in the area where the ceiling meets the upper walls of the grotto.
In the center of the grotto there is a three-tier, pagoda-style central pillar, which measures approximately 6.2 m in height. It is carved to resemble a wooden structure complete with roof tiles, eaves, rafters, columns, and bracket sets. Unfortunately, the lower tier has suffered severe erosion, but the upper and middle tiers remain relatively well preserved. Three niches are carved on each side of the upper and middle tiers. The corners of the upper tier are engraved with hexagonal columns similar to those once carved on the middle tier, but these are no longer extant. The central niche in the upper tier is trapezoidal, while the two on the sides are arch-shaped. The niches contain a variety of Buddha and Bodhisattva combinations. The middle tier has an arched central niche flanked by trapezoidal ones on either side. The niches on the east and west sides have suffered damage, with the only discernible details being the apsaras carved on the lintels. On the south side, the central niche contains one Buddha and two Bodhisattvas, while that on the left contains a seated Buddha, and the one on the right has been destroyed. All three niches on the west side of the middle tier contain images of Bodhisattvas.
The back (north) wall of the grotto is carved with three large niches, but the figures once contained in them have largely been damaged. The east and west walls are divided into three sections. The upper section of each wall is sculpted with triangular patterns and rows of Buddha niches, while the middle section is carved into four niches separated by five-tier pagodas, each of which houses a Buddha niche that has suffered significant damage. The lower section of the walls originally depicted a number of scenes from the Life of the Buddha, but due to serious weathering only the scene of the Archery Competition is still recognizable. The south wall was originally carved with an arched entrance with a window above it. It collapsed and was subsequently renovated in the 1960s.
For more details, go to the Encyclopedia of Buddhist Arts: Caves T-Z, page 1639.
Cite this article:
author = Hsingyun and Youheng and Johnson, Peter and Mankuang and Huntington, Susan and Edson, Gary and Neather, Robert,
booktitle = {Encyclopedia of Buddhist Arts: Caves T-Z},
pages = 1639,
title = {{Yungang Grotto 2}},
volume = 9,
year = {2016}}