
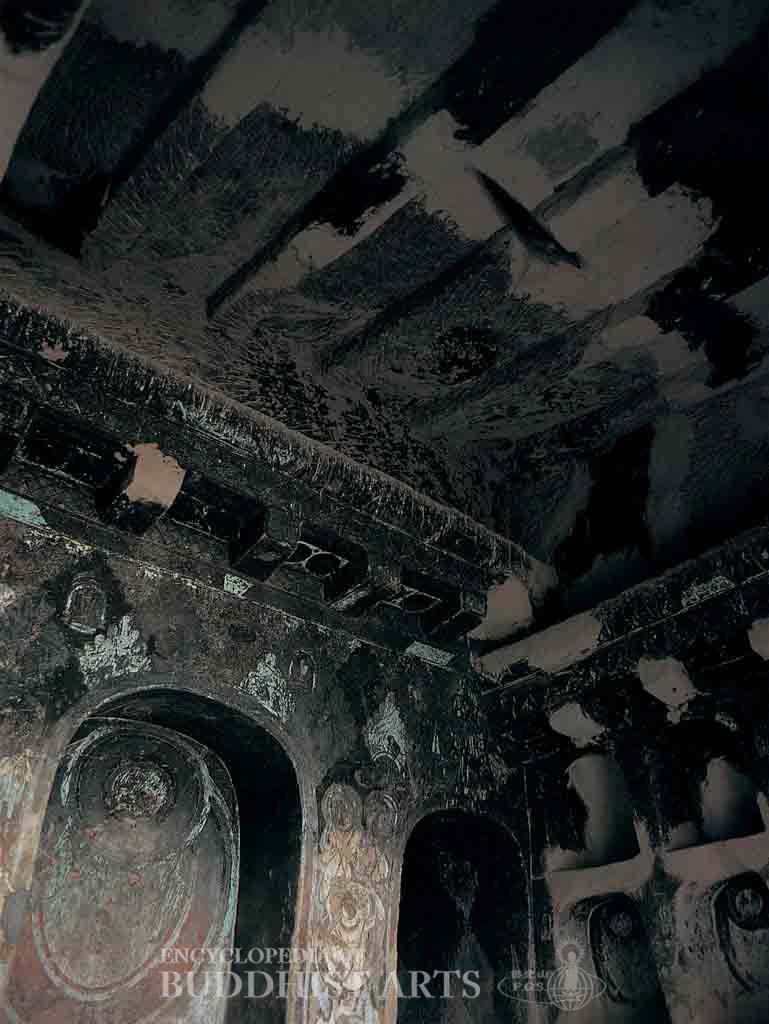
Kizil Cave 99: Main Chamber - Back Wall and Ceiling
Kizil Cave 99: Main Chamber - Back Wall
Kizil Cave 99
CHINA, Xinjiang, Aksu
Situated within the inner valley, this cave was constructed around the 7th century. It has a central pillar, an antechamber, main chamber, and corridors. The rectangular antechamber measures 3.65 m wide, 3.7 m high and 2.65 m long. It has a flat ceiling, and on the back wall is a doorway which leads to a rectangular main chamber that measures 3.1 m wide, 3.55 m high, and 2.55 m long. On the ceiling and walls of the main chamber are imitation tie beams carved to create the resemblance of a house with eaves. This is the only cave at Kizil that displays this feature. Two corridors which connect to the rear corridor are located on either side of the back wall and have barrel-vaulted ceilings. The rear corridor also has a barrel-vaulted ceiling and measures 3.86 m wide, 2.79 m high, and 1.58 m deep. Much of the wall surface in the cave have blackened from smoke.
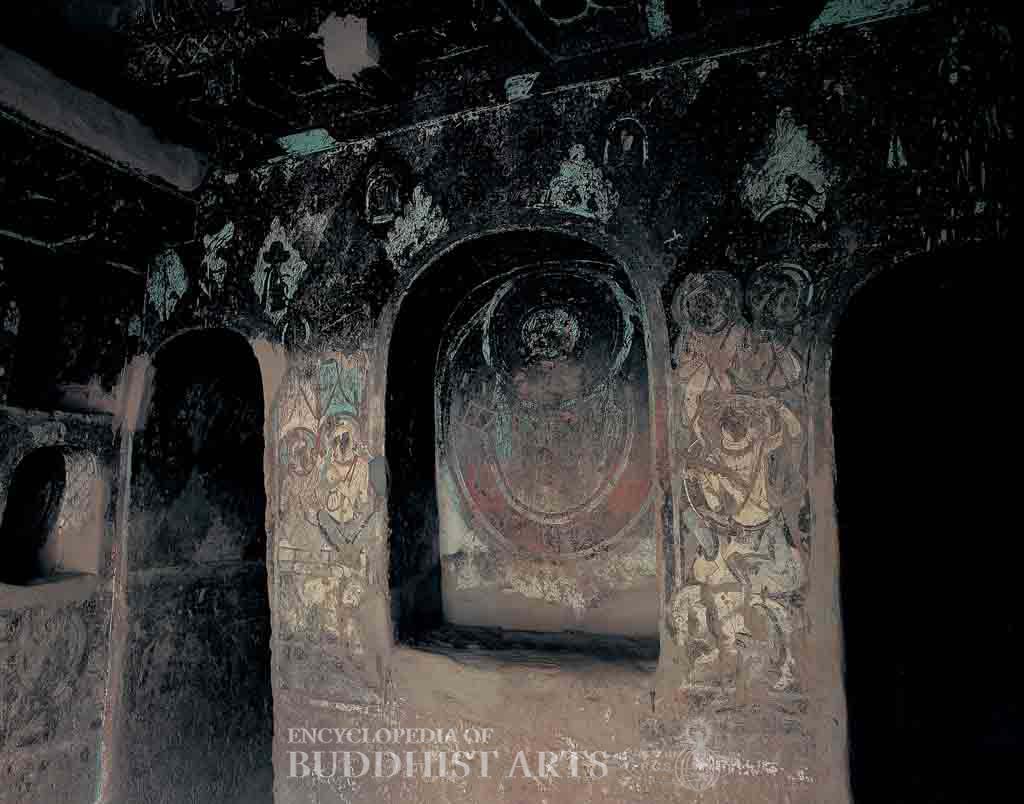
A niche in the center of the back wall is housed within the main chamber. The murals in the niche are damaged and the Buddha statue is missing. Murals of landscapes, animals, figures in meditation, and diamond-shaped illustrations on the Jatakas are depicted above the niche. The left and right walls display two rows of small niches. Below the niches on each wall are murals depicting stories from the Life of the Buddha. Portraits of two Kuchean donors also remain on the right wall.
The barrel-vaulted ceilings of the side corridors display images of standing Buddhas, and the inner wall of each side corridor has a niche, both of which are bereft of statues. On the outer wall of the left corridor are murals from the Life of the Buddha, including the Birth of Prince Siddhartha, the Seven Steps at Birth, and the Bathing of the Prince by Nine Nagas. Three murals from the Life of the Buddha, such as the Decision to Renounce are depicted at the bottom of the outer wall in the right corridor. Surrounding the murals are diamond-shaped illustrations.
Statue platforms and standing Buddha images adorn both side walls of the rear corridor. The outer wall contains a parinirvana platform and murals which are damaged, but the nimbus and mandorla of the reclining Buddha which once rested on the platform can still be seen. In the center of the inner wall is a niche with a vaulted ceiling. A heavenly being is painted on the wall to each side of the niche. The ceiling at one time was covered with diamond-shaped illustrations, but most of these are no longer discernable.
For more details, go to the Encyclopedia of Buddhist Arts: Caves R-L, page 537.
Cite this article:
author = Hsingyun and Youheng and Johnson, Peter and Mankuang and Huntington, Susan and Edson, Gary and Neather, Robert,
booktitle = {Encyclopedia of Buddhist Arts: Caves R-L},
pages = 537,
title = {{Kizil Cave 99}},
volume = 6,
year = {2016}}